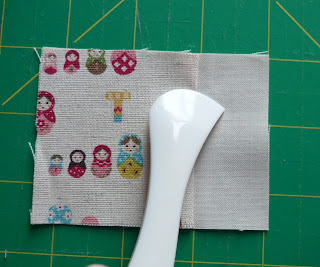
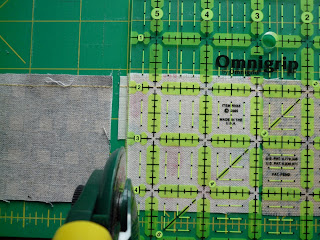
I started with about 1 Fat Quarters worth of scraps and 1 Fat Quarter of a solid, some fusible fleece, ribbon and perle cotton.
 |
| the fabric cut to size |
Chain piecing, attach the 16" strip along the right edge of 6 of your squares, one after the other.
 |
| the 16" strip along the right hand edge of 6 squares |
Now you can trim these into 6 separate squares.
 |
| pressing open |
Now if you take all 9 squares you can lay them out in a 3x3 grid, so that only the right hand column don't have a border on the right.
 |
| grid layout |
 |
| rows connected |
Now take the 8" strips and sew two 8" strips along the bottom of the top two of your rows. Connect the three rows, then add an 8" strip to the left and right hand sides.
 |
| top almost done |
Now that you have the game top, press it into submission..
 |
| Messy bumpy top getting pressed |
Isn't that better? Don't cry too much that your squares all look different sizes and shapes, just so long as the whole thing is a good 9.5" square... Unless you're a fussy bugger skilled precise quilter, in which case I doubt you'd have that problem in the first place...
 |
| Pretty, flat top! |
Cut a square of batting at 10" square, and from your solid a 10.5" square. Layer up for quilting and baste.
 |
| basted top |
 |
| Ditch quilting then more quilting around the four outer squares. |
Attach your binding around the edges. (don't forget the ribbon like I did, see below. You want a good 12" or more length, fold in half, then about 2" down from the fold, fold again and its that fold you want to sew over, so that once done you will have a wee loop to hang it up, and two long ends to thread up and tidy the playing pieces)
 |
| binding machine sewn onto front |
 |
| spot the "deliberate" mistake |
Then sit back and weep / swear profusely / throw a wobbly cos you've forgotten to slip the folded end of a length of ribbon under the binding before you machine stitched it to the front. Hey Ho, on to the game pieces next.
 |
| ten fusible fleece squares. |
Cut ten 2" squares from your fusible fleece.
On more of your solid that you used for the back of the "game board" draw out ten 2.5" squares. Lay the fusible fleece squares fusible side down in the middle of each square (so you have a quarter inch seam) and follow manufacturers guides to fuse it all together.
 |
| positioning of the squares |
 |
| stitching a nought... |
Here we have all ten stitched.
Cut ten little 2" bits of ribbon, and ten little 0.5" squares of a low tack masking tape. Fold a bit of ribbon in half and hold the ends, put a square of masking tape over the loop end.
With your embroidered x & o's facing up, attach the masking tape with the loop of ribbon in such a way that the tape and loop are within the edges of the 2" fused fleece square, and the edges of the ribbon are sticking out over to the corner of the 2.5" square you marked out.
Decide what you would like to use for the back of the game pieces. In this version, I used the largest of my scraps and I made a 7.5" square block, which I cut into 9 x 2.5" squares, then cut an extra 2.5" square. (why I bothered will become clear later...) However it is of course much easier just to use a single bit of fabric big enough to put on top and cover it all.... Pin it in place (right sides together).
Now you need to sew around the edge of each piece of fusible fleece, always remembering to leave an inch of an opening gap at the bottom of each square. Once all are sewn, cut into individual squares.
Trim the corners... being very careful not to actually cut the stitches off too (no, I didn't this time but I did the last time...)
Now you can turn them all the right way out and peel off the masking tape carefully. (Don't leave it on overnight, it seems to get stickier the longer its stuck... trust me)
Ignore my chubby wee hand and focus on the stitching... whip stitch the opening closed, And you're done!
Look! The backs make a jigsaw!


